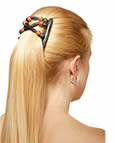
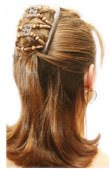
ok here we go..ta daa!
FRENCH KNOT

1. Gather the hair into a long flat bun at the back of the head and hold down with left hand.
2. With the right hand insert the first comb securely underneath the style. Make sure the comb follows the curve of your head.
3. With your right hand put your fingers through the elastic beaded openings and grab the bun from the left hand.
4. With your left hand now free, stretch the second comb over the style.
5. Flatten second comb against your head and slide underneath first comb.
6. Push both combs together to secure style.
FRENCH PONY

1. Gather the hair in a high ponytail. With your right hand twist the high ponytail down a few times in clockwise direction. Hold style down with left hand.
2. With the right hand insert the first comb securely underneath the style. Make sure the comb follows the curve of your head.
3. With your right hand put your fingers through the elastic beaded openings and hold ponytail down.
4. With your left hand stretch the second comb over the style.
5. Flatten second comb against your head and slide underneath first comb.Push both combs together to secure.

1. Gather the hair in a high ponytail in your left hand.
2. With the right hand insert the first comb securely underneath the style. Make sure the comb follows the curve of your head.
3. With your right hand put your fingers through either the first, second or third elastic loop and grab the ponytail.
4. With the left hand pull the second comb over at the same time pulling the ponytail through the loop.
5. Flatten second comb against your head and slide underneath first comb. Push both combs together to secure.
HALF PONY

1. Gather front half of hair into a bun in your left hand.
2. With the right hand insert the first comb securely underneath the style. Make sure the comb follows the curve of your head.
3. With your right hand put your fingers through the elastic beaded openings and grab the bun from the left hand.
4. With your left hand now free, stretch the second comb over the style.
5. Flatten second comb against your head and slide underneath first comb.
6. Push both combs together to secure style.
1. Gather the hair as in a half pony.
2. Divide hair into about 8-10 strands.
3. Take single strand of hair hanging down underneath the combs, twist into coils and wrap back underneath the beads from the outside.
4. Do this with all the hair.
5. Certain pieces can be pulled back out
TUSSLE
1. Gather hair under Hairmagic as in Half Pony above.Then take small strands of hair, one at a time, twisting them a few times and tucking them underneath various different elastic strands.
2. Some pieces can be tucked tight and other loose, i.e. leave long pieces out as in Tussle picture.
1. Gather the hair in a ponytail in the left hand. With your right hand twist the ponytail twice in a clockwise direction. With your right hand flatten the style against the head with the top pieces sticking out and hold style down with left hand.
2. With the right hand insert the first comb securely underneath the style. Make sure the comb follows the curve of your head.
3. With your right hand put your fingers through the elastic beaded openings and hold ponytail down.
4. With your left hand stretch the second comb over the style.
5. Flatten second comb against your head and slide underneath first comb. Push both combs together to secure.
6. Pull overlapping hair back to form a cascade effect.
7. For a different look you can tuck pieces of the hair back underneath the elastic strands. This achieves a wonderful messy look that is very popular.
all credits goes to : www.hairmagicbymissq.com
so, what are you waiting for! choose your style, grab you leave on SUNSILK moisturizer and go pretty ^____~


No comments:
Post a Comment